
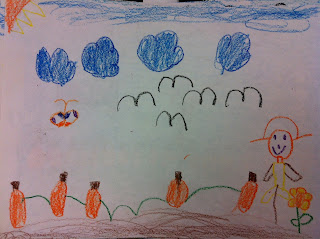
For class A, I gave them an extra day, so to speak, on this otherwise they would be ahead of the other class, which would totally mess up my organization. On the first day of this unit, I simply gave the students a drawing assignment to draw a pumpkin patch. They had to use the entire period to do so and put lots of details in. I reminded them about my craftsmanship rubric which hangs in the classroom, and we talked about what kinds of details they have seen when they visited a pumpkin patch (scarecrow, barn, tractors, etc.).
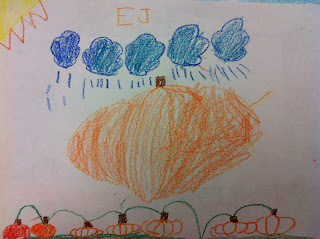
On the second day for class A, we looked at various pictures of pumpkins and pumpkin patches to talk about pumpkin shapes. We talked about how all pumpkins aren't just circles...some can be square, triangular, and oval. Some are tall and skinny whereas others are short and fat! I did a demonstration and had students draw with me, how to create a realistic pumpkin. After they got the hang of it, I had them turn their papers over and draw a pumpkin patch again using realistic pumpkins. Here are some pairs of drawings done by students over these two classes:


Wow...I just spent 20 minutes trying to get these pictures next to each other in the pairs that they below with! So frustrating! And they're not even straight with each other...Blogger needs to come up with a better way to do this!
I think my favorite drawing is the last one with the tractor! We haven't even touched on depth yet in 1st grade, but he already seems to have an idea how to do it! He didn't use a horizon line, but none the less, he's already on his way!
Class B had one class less for this, so yesterday when I had them, I gave everyone a piece of drawing paper and had them fold it in half hamburger style. I gave them 10 minutes to draw a small pumpkin patch, discussing the same things as I did with class A, on the top of their folded paper. Then, I did the drawing demonstration with them and had them practice drawing realistic pumpkins on the bottom half. When they were comfortable with that, they had about 20 minutes left to do their realistic pumpkin patch drawing on the back. And voila, they're caught up!


Next class, we will spend about 5 minutes in small groups discussing our first pumpkin patch drawings with our second pumpkin patch drawing. For the final aspect of this project, we will talk about creating depth in our drawings by overlapping pumpkins. For the final project, we will do a pastel pumpkin patch drawing on black construction paper, where the kids will learn how to blend pastels.
Good lesson - it's great to see the before and after comparisons :) The pictures are coming up sided by side and in line on my browser (Except for the last pair), but I agree, getting photos positioned where you want them on blogger is totally ridiculous!! I wonder who we can lobby to get a fix on this?
ReplyDeleteI've been frustrated with the new blogger too. It used to be easy to move pics around, and now it is awkward, time consuming, and a royal pain. I like Elizabeth's idea to lobby to fix it.
ReplyDelete